|
Amazing techniques which will transform your use of PowerPoint presentations. Make your presentation stand out from the crowd! |
|
|||||
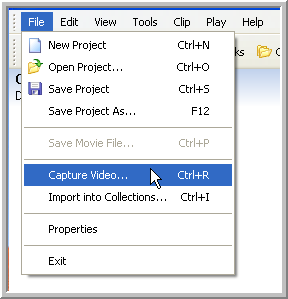
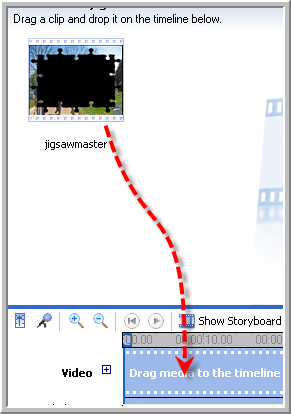
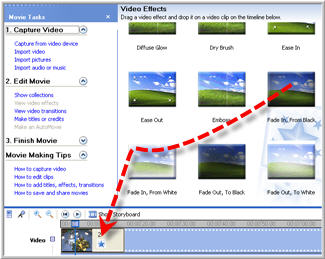
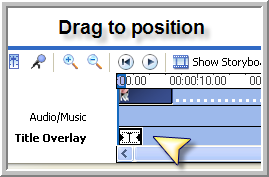
PowerPoint Text & Video This seems easy at first. Insert the video, add the text box, select video and send to back. But no matter how you play with order settings the video always jumps to the front when you play it - the text is hidden! This is because the video is actually playing outside of Powerpoint (in mplay32.exe) and the playing window is in front of the Powerpoint window. The only objects in PowerPoint that appear in front of video are activX objects. PowerPoint MVP Austin Myers explains how to use this here. You can simply make the video window smaller and put the text below or above the window. You can buy quite expensive add on programs that may or may not do what you want. However the only way to get the text on top without an add on is to put it in the video itself and this isn't that difficult! First you need Windows Movie Maker v.2, good news is that if you have Windows XP you may well already have it. Look for a shortcut in Start > All programs OR a folder in the program folder "Movie Maker" OR do a search for "moviemk.exe". If it isn't there you can download it free from Microsoft downloads (Windows XP required). This program enables you to add text overlays and it's not that difficult! How to Do it! Open Movie Maker, start new project and use "Import into collections" to import the video. You should work on a copy of the video and retain the original. (Diagram 1) Drag the video preview icon on to the timeline. It the timeline is showing as a story board press Ctrl T to get timeline view or click on "show as timeline". This is a good time to add a fade in and fade out to your video which will reduce the flashing effect in PowerPoint when the video starts. Do this by view>task pane (if it's not visible) and in EDIT MOVIE choose "View Video Effects" In the right pane find "fade in from black" and then drag the effect onto your clip in the timeline. Do the same for "fade out to black" .( Diagram 3) In the Tools menu choose "Titles and credits..." and then click "title on the selected clip" (unless you want one of the other options!). You should get two areas to type in text (title and subtitle). Type in your text and you'll see a preview to the right. If you wish, click "Change the title animation" or "Change the text font and colour" to see different animations or text font and colours. Try to choose a font similar to the fonts used in your PowerPoint presentation. When you're happy click "Done, add title to movie" A title icon appears in the title overlay timeline. This can be resized to change the duration of the effect or dragged to any position to change the entrance time. You can add more titles by repeating the steps from Tools > Titles and credits. If you have several clips you can drag then to the timeline and add transitions between then by choosing "View Video Transitions" and dragging the chosen transition to the cut between the clips. Finally File > Save movie file ready to insert into Powerpoint. Not that hard was it! If you have earlier versions of Windows with Movie Maker v.1 you can experiment to get a similar effect but v.2 is a huge improvement! These are just the basics - time to experiment! If you want to learn how to use powerpoint, you should get an online degree. You can take online college courses and then a career test.
|
Diagram 4
|
|
|||
This website is sponsored by Technology Trish Ltd |
|||||